DIY Reedbed
Reed bed construction
The reed bed is really just a pond filled with gravel of different sizes with reeds growing on the surface.
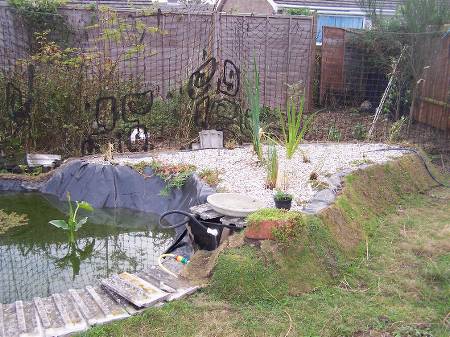
We built our DIY reed bed from the broken concrete we had from our work on the property, bedded together with mud and with turfs on the outer walls. Our reed bed is raised above ground to give enable to outflow to enter the pond at the right level. The bed is lined with carpet and pond liner and filled with layers of gravel and pea gravel with a thin layer of sand at the surface. Reed beds are categorised as horizontal beds where the water enters at one end and flows horizontally to the outlet collector and vertical beds where the water flows down vertically through the bed. The vertical beds fill and empty as they work oxygenating the bed as they do so. The horizontal beds stay full most of the time and rely on the reeds pulling oxygen down into their roots to feed the aerobic microorganisms that keep the water smelling fresh. We have built a bed that combines both of these types and plan to empty it totally sometimes to boost the aerobic micro-organisms (I am trying a period of once a month at the moment. It takes some time for the reeds to grow and become fully functional. We planted ours from root fragments we dug up from existing reeds growing wild and these are sprouting well. We also planted rushes and bull rushes although these apparently don't have the same oxygenating power that reeds have.
Our reed bed is only dealing with bath and washing water (not sewage) and is about 4 square metres in area and 35cms deep
The water from the bath and sinks etc runs into in a surge tank and flows slowly from there into the reed bed via a hose (for cheapness, from a car boot) The water runs through a filter (made from a stainless steel pan scourer) as it leaves the tank to catch the hair and other bits (needs to be cleaned every month or so) Using a hose to take the water to the reed bed is much easier than using conventional water pipe.
PDF on reed bed construction
..


